This article will help you run the PDF Repair or Component Repair tool and understand what each utility does. We offer the PDF Repair tool and the Component Repair tool to resolve issues you may occasionally encounter using Lacerte.
To run the PDF Repair tool:
Step 1: Download and install the Lacerte Tool Hub
- Close Lacerte.
- Download the Lacerte Tool Hub Install file. Save the file somewhere you can easily find it (like your Downloads folder or your Windows desktop).
- Open the file you downloaded (lacertetoolhub_setup.exe).
- Follow the on-screen steps to install and agree to the terms and conditions.
- When the install finishes, double-click the icon on your Windows desktop to open the tool hub.

![]() If you can't find the icon, do a search in Windows for Lacerte Tool Hub and select the program.
If you can't find the icon, do a search in Windows for Lacerte Tool Hub and select the program.
Step 2: Using the tool in the Lacerte Tool Hub
- Open the Lacerte Tool Hub.
- Select Printing on the left.
- Click on Lacerte PDF Repair Tool.

- Follow the on-screen instructions to run the Lacerte PDF Repair tool.
To run the Component Repair tool:
We recommend you have your IT specialist run this tool for you. The Component Repair tool is not designed to fix any issue with printers or printing.
Step 1: Download and install the Lacerte Tool Hub
- Close Lacerte.
- Download the Lacerte Tool Hub Install file. Save the file somewhere you can easily find it (like your Downloads folder or your Windows desktop).
- Open the file you downloaded (lacertetoolhub_setup.exe).
- Follow the on-screen steps to install and agree to the terms and conditions.
- When the install finishes, double-click the icon on your Windows desktop to open the tool hub.
![]() If you can't find the icon, do a search in Windows for Lacerte Tool Hub and select the program.
If you can't find the icon, do a search in Windows for Lacerte Tool Hub and select the program.
Step 2: Using the tool in the Lacerte Tool Hub
- Open the Lacerte Tool Hub.
- Select Program on the left.
- Click on Run Repair Tool, selecting the one relevant to the version of Lacerte you're troubleshooting.
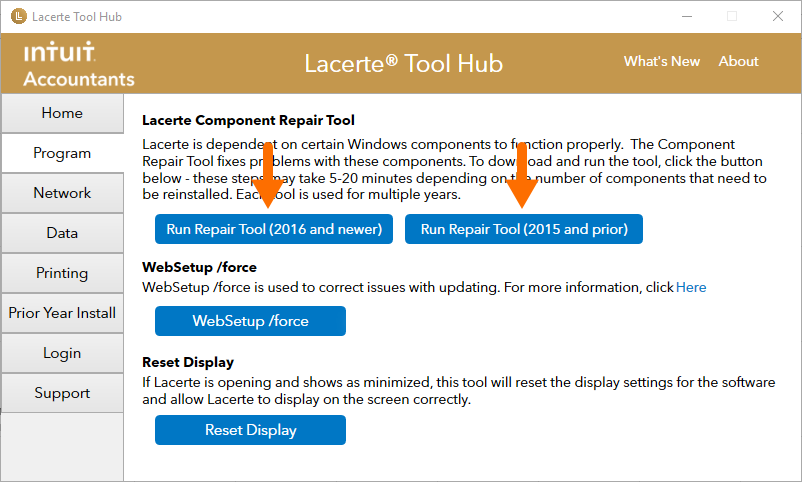
- Follow the on-screen instructions to launch the Component Repair tool.
